
This burger is all about the sound—smacking that beef ball onto a hot skillet, hearing it sizzle and crackle as it hits the surface. It’s loud, messy, and immediate, with juices bubbling up and forming a crust.
You’ll need to work quick, smashing the meat flat then flipping it once it’s got that dark sear. No fancy tools, just your spatula and a bit of patience for that perfect crust to form before the cheese melts over.
The satisfying sizzle and crackle as you smash the meat on the hot skillet, hearing that immediate sear and the juices bubbling up—it’s a messy, loud symphony of cooking.
What goes into this dish
- Ground beef: I use 80/20 for juiciness, but leaner works if you prefer less fat—just watch it stay tender. The key is how quickly it sears in that hot pan, releasing a rich beef smell with a hint of char.
- Salt: I sprinkle a generous pinch right on the meat before smashing. It helps develop a crust that crackles under the spatula. Skip or reduce if you’re watching sodium, but it does make a difference in flavor.
- Pepper: Freshly cracked black pepper adds a smoky bite. I toss it on right before smashing—imagine that spicy aroma melding with the sizzling meat, waking up your senses.
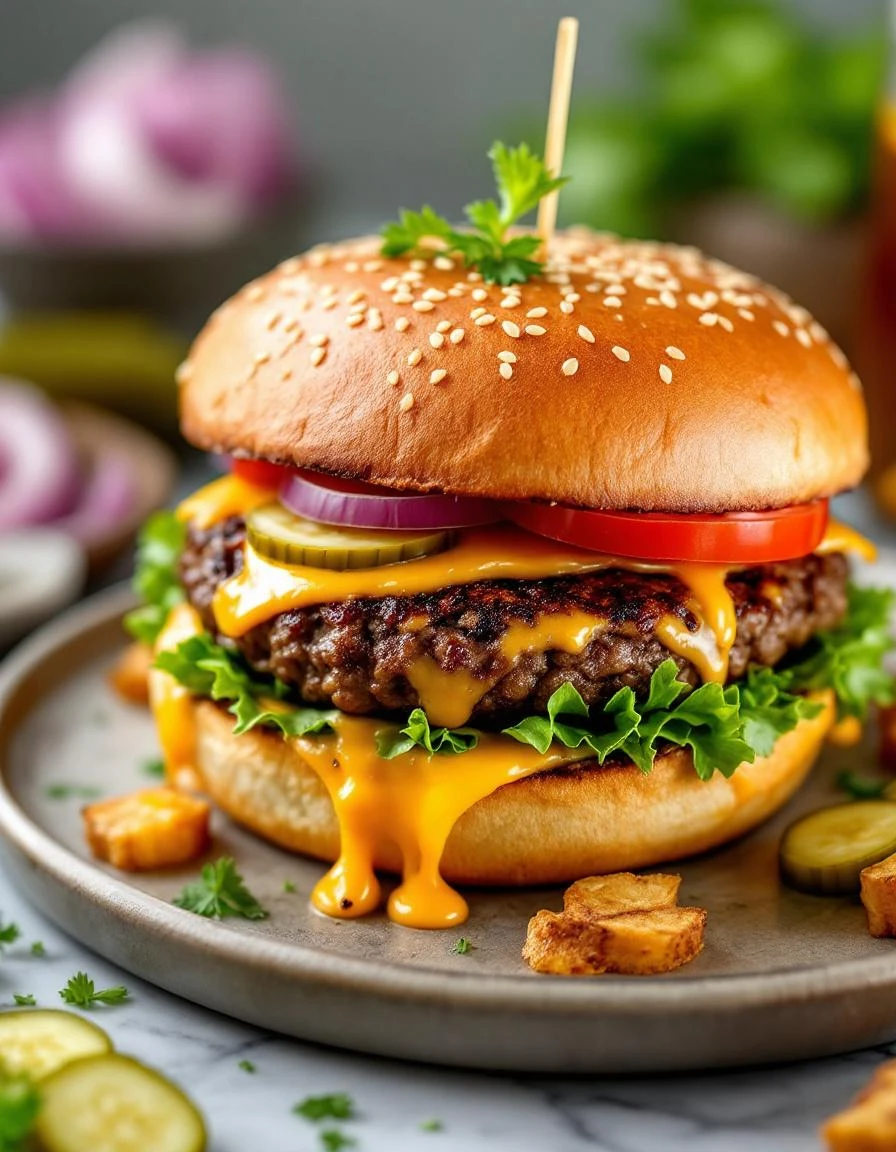
- Cheese: American slices melt fast and gooey, perfect for that melty top. But if you want sharpness, try cheddar or pepper jack. Just lay it on once the patty is almost done so it melts into that perfect layer.
- Buns: I prefer potato buns—they’re soft, slightly sweet, and hold up well. Toast them lightly in the same skillet for a nutty aroma and a sturdy base that keeps everything together. Skip if you like plain or are gluten-free.
- Oil: A light coating of vegetable or canola oil in the pan prevents sticking and helps with that crisp crust. If you’re out, butter works too, but watch for burning and smoky smell.
- Optional toppings: Pickles, sliced onions, or a smear of mustard—add just before assembling so they stay fresh and bright. Keep it simple; the smash is all about that juicy, crispy patty.
Sizzle Smash Burger
Ingredients
Equipment
Method
- Form the ground beef into four equal-sized balls, roughly the size of a golf ball, and set aside.
- Preheat your skillet over medium-high heat until it’s hot and begins to shimmer, and add a light coating of oil.
- Place the beef balls onto the hot skillet, spacing them apart, and sprinkle each with a pinch of salt and some cracked black pepper.
- Using a sturdy spatula, firmly smash each beef ball down until it’s about 1/2 inch thick. Hear the sizzle and see the juices bubbling up as the meat sears.
- Cook for about 2-3 minutes until the bottom develops a deep, dark crust and the edges look crispy and caramelized.
- Flip each patty carefully, listening for that satisfying crackle, and cook for another 2 minutes until the other side is equally seared.
- Lay a slice of cheese on each patty and cover the pan briefly or wait a minute for the cheese to melt into a gooey topping.
- While the cheese melts, toast the buns lightly in the same skillet until golden brown and fragrant.
- Assemble the burger by placing each patty on the toasted buns, adding optional toppings like pickles or onions if desired.
- Finish by topping with the top bun and give it a gentle press to keep everything together.
- Serve immediately, reveling in the crispy crust, juicy interior, and melty cheese—perfectly loud and messy, just as intended.
Notes
Common mistakes and how to fix them
- FORGOT to preheat the skillet: Ensure it’s hot enough before smashing for that perfect sear.
- DUMPED too much meat at once: Work in batches to keep the crust crisp and avoid steaming.
- OVER-TORCHED the burger: Keep an eye and adjust heat to prevent burning the crust before cooking through.
- MISSED flipping at the right moment: Wait for a deep brown crust before flipping for maximum crunch.
Make-Ahead and Storage Tips
- Form the beef balls ahead of time, keep chilled for up to 24 hours to maintain freshness and prevent spoilage.
- Pre-salt the meat right after forming the balls—this speeds up seasoning and enhances crust formation during cooking.
- Freeze the beef balls if not using within a day, for up to 1 month; thaw in the fridge overnight before smashing.
- Prepare toppings and buns in advance; store toppings in airtight containers and toast buns just before assembly for optimal crunch.
- Reheat cooked patties in a hot skillet or under the broiler—observe the crust, aiming for that crispy crackle again without drying out the meat.
- Flavor can intensify or dull slightly after storage—consider a quick sprinkle of salt or a dash of fresh pepper before reheating to brighten the taste.
FAQs
1. How do I know when the burger is ready to flip?
The patty should have a loud sizzle when it hits the hot skillet, making a crackling sound that echoes in your ears, with a caramelized crust forming quickly. It’s all about that immediate sear that locks in juices.
2. What’s the best way to get a crispy crust?
Look for a deep, dark crust that’s starting to pull away from the pan edges. The surface will be crusty and crackly, with a rich beef smell wafting up, indicating it’s time to flip for that crispy side.
3. How do I achieve that satisfying crunch?
Use a hot pan and a pinch of salt on the meat before smashing. Press down firmly with your spatula—feel the meat resist and then give way, creating that satisfying crunch and sear.
4. Why isn’t my cheese melting?
If the cheese isn’t melting fast enough, cover the pan briefly or lower the heat slightly. You want gooey, bubbling cheese that stretches when you bite, not melted and runny.
5. How do I reheat leftovers without losing crunch?
Reheat in a hot skillet or under the broiler. Listen for the crackle of the crust re-forming and watch the cheese turn glossy and bubbly, restoring that fresh-from-the-pan crunch.

Hi, I’m Olivia Chen-Williams, a professional chef, cooking instructor, and the founder of Turn Around At 50. For nearly three decades, my life has revolved around kitchens. Not the quiet, romantic kind, but the real ones. Hot, loud, demanding, and deeply alive.
