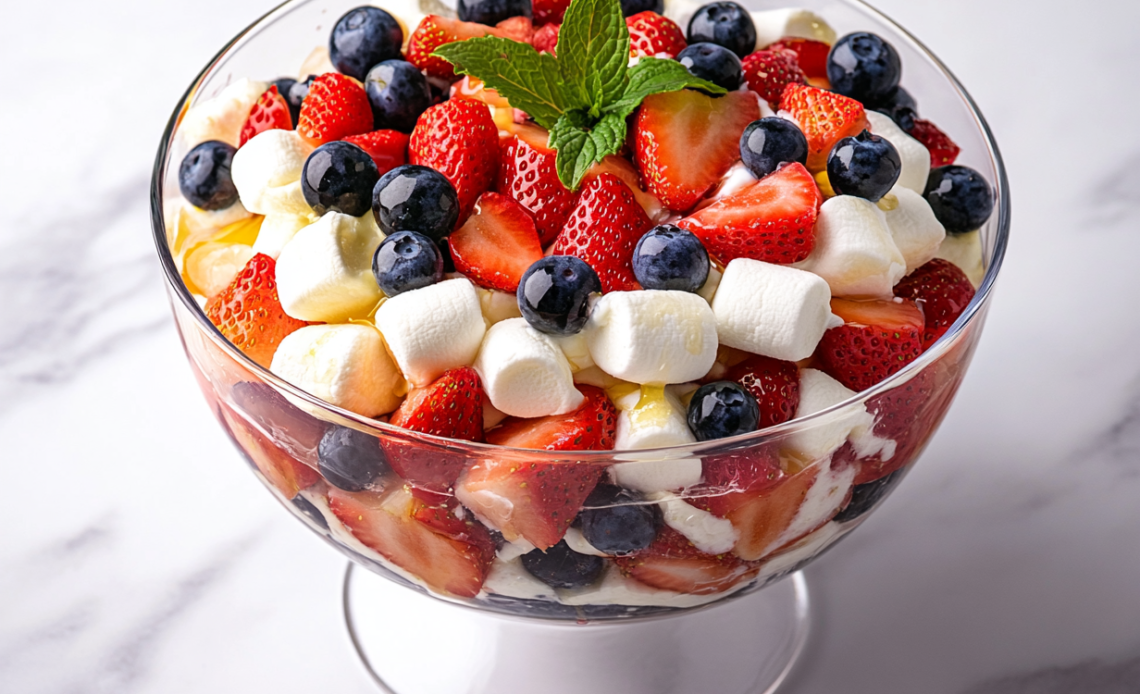
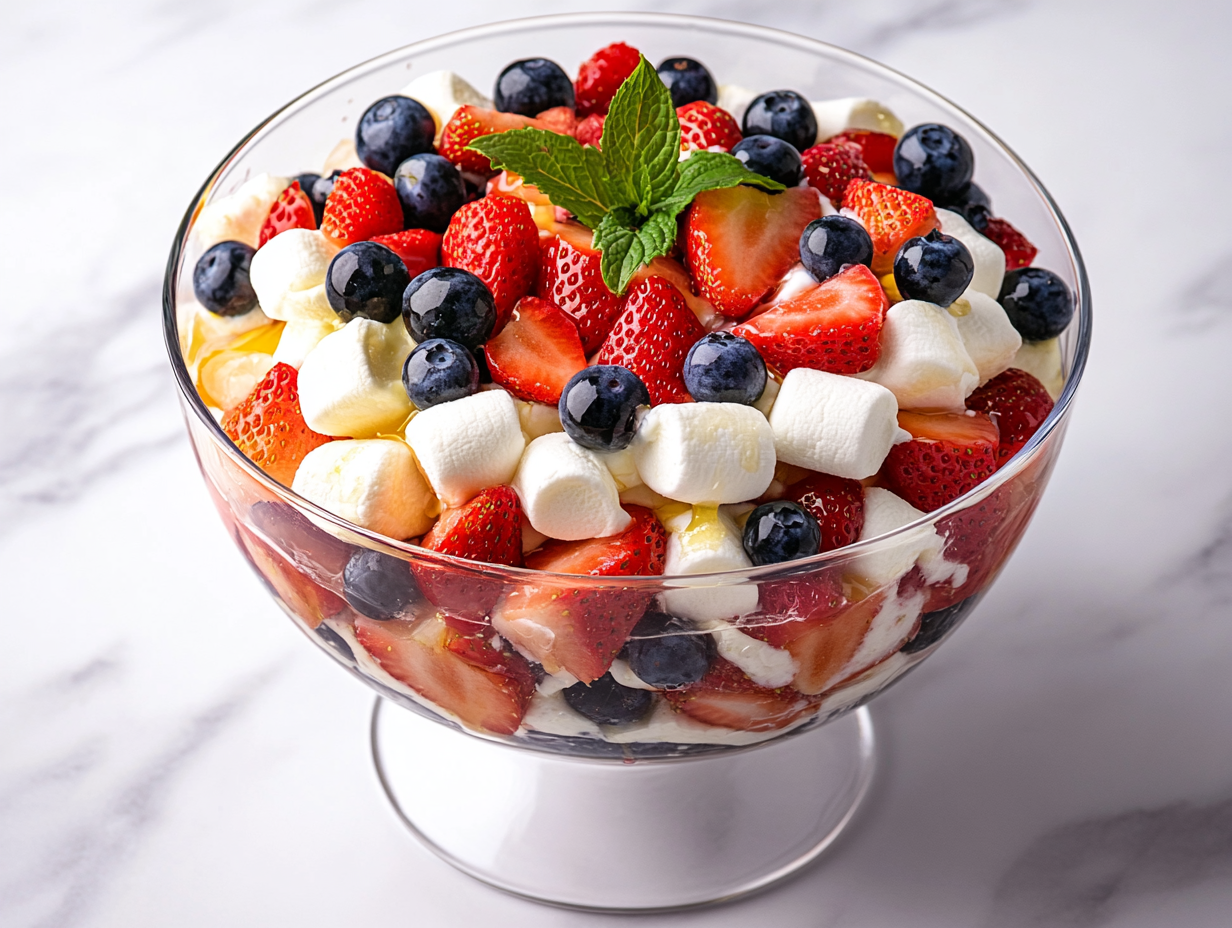
Red, white, and blue bites are one of those snacks I put together when I want something festive without turning it into a full baking project. They’re simple, fresh, and feel right at home on a summer table.
I usually make them for warm-weather holidays, backyard gatherings, or anytime I need a last-minute treat that still looks intentional.
They’re light, colorful, and easy to grab, which makes them perfect for casual celebrations.
Table of Contents
Behind The Recipe
Red, white, and blue bites are one of those snacks I put together when I want something festive without turning it into a full baking project. They’re simple, fresh, and feel right at home on a summer table. I usually make them for warm-weather holidays, backyard gatherings, or anytime I need a last-minute treat that still looks intentional. They’re light, colorful, and easy to grab, which makes them perfect for casual celebrations.
Why You’ll Love This Recipe
- Fresh and Light: Perfect for warm days
- No Baking Required: Completely no-cook
- Festive and Colorful: Instant visual appeal
- Quick to Assemble: Minimal prep time
- Naturally Sweet: Fruit-forward flavor
- Kid Friendly: Easy and approachable
- Crowd Friendly: Easy to scale up
Chef’s Pro Tips for Perfect Results
- Use Firm Fruit: Holds shape better
- Dry Fruit Well: Prevents slipping
- Cut Even Sizes: Cleaner presentation
- Chill Before Serving: Best texture
- Assemble Close to Serving: Keeps everything fresh
- Moisture Tip: Keep marshmallows and cake dry to prevent sogginess.
Kitchen Tools You’ll Need
- Cutting Board: Stable prep surface
- Sharp Knife: Clean fruit cuts
- Paper Towels: Drying fruit
- Serving Platter: Displays colors nicely
- Toothpicks or Skewers: Easy assembly
Ingredients in This Recipe
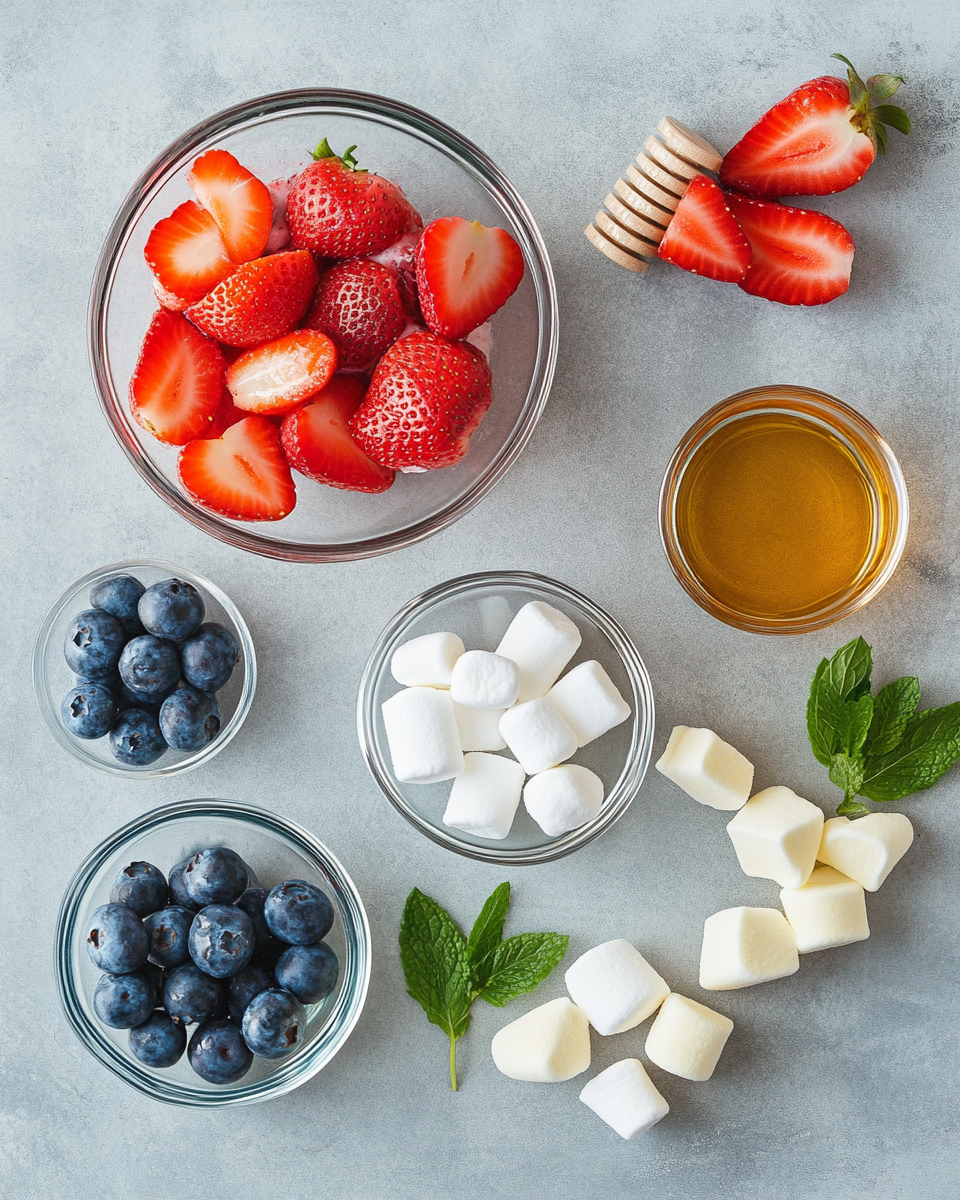
- Strawberries 1 cup (150 g), hulled and halved: Bright red and naturally sweet
- Blueberries 1 cup (150 g): Juicy and slightly tart
- Mini Marshmallows or Cubed Angel Food Cake 2 cups (about 100 g marshmallows or 200 g cake): Soft white base
- Cream Cheese or Greek Yogurt ½ cup (120 g), optional: Optional creamy element
- Honey 1 teaspoon optional: Optional light sweetness
- Vanilla Extract ½ teaspoon, optional: Soft flavor boost
- Fresh Mint 1 tablespoon, optional: Optional fresh finish
Ingredient Substitutions
- Strawberry Swap: Raspberries or cherries
- Blueberry Option: Blackberries cut small
- White Element Swap: Banana slices(use immediately to prevent browning) or white chocolate
- Cream Base Alternative: Coconut yogurt
- Sweetener Option: Maple syrup
Ingredient Spotlight
- Strawberries and Blueberries: Provide natural sweetness and color
- White Base: Balances fruit with softness
How To Make This Recipe
- Wash and dry strawberries and blueberries thoroughly.
- Cut strawberries into halves if large.
- If using angel food cake, cut into small bite-sized cubes.
- In a small bowl, mix cream cheese or Greek yogurt with honey and vanilla extract until smooth.
- Place one marshmallow or cake cube on a toothpick.
- Add one strawberry piece and one blueberry.
- Add a small amount of creamy mixture if using.
- Makes approximately 18–24 bites.
- Repeat until all bites are assembled.
- Arrange on a serving plate and garnish with mint if desired.
- Serve immediately or chill before serving.
Red, White, & Blue Bites Recipe
Ingredients
Equipment
Method
- Wash and dry strawberries and blueberries thoroughly.
- Cut strawberries into halves if large.
- If using angel food cake, cut into small bite-sized cubes.
- In a small bowl, mix cream cheese or Greek yogurt with honey and vanilla extract until smooth.
- Place one marshmallow or cake cube on a toothpick.
- Add one strawberry piece and one blueberry.
- Add a small amount of creamy mixture if using.
- Makes approximately 18–24 bites.
- Repeat until all bites are assembled.
- Arrange on a serving plate and garnish with mint if desired.
- Serve immediately or chill before serving.
You Can Also Try Out Other Recipes
Texture & Flavor Secrets
- Soft base balances juicy fruit
- Fresh fruit provides natural sweetness
- Creamy element enhances smooth texture
What To Avoid
- Using overripe fruit
- Assembling too far in advance
- Using wet fruit
Nutrition Facts (Approximate, Per Serving – 4 bites)
- Calories: 90 -120
- Protein: 2 g
- Carbohydrates: 18 g
- Fat: 2 g
- Sugar: 14 -18 g
Make-Ahead and Storage Tips
- Prep Fruit Ahead: Store separately up to 1 day
- Assemble Day Of: Best appearance
- Refrigerate Leftovers: Refrigerate assembled bites up to 24 hours. Store cut fruit separately up to 2 days.
- Avoid Freezing: Texture won’t hold
How to Serve This Dish
- On a Platter: Easy grab-and-go
- With Yogurt Dip: Adds creaminess
- At Outdoor Events: Light and refreshing
Creative Leftover Transformations
- Fruit Salad: Toss leftovers together
- Yogurt Parfaits: Layer with granola
- Smoothie Add-In: Blend with milk
- Frozen Fruit Pops: Blend and freeze
Additional Tips
- Add Mint Leaves: Fresh contrast
- Use Clear Platters: Colors pop
- Serve Chilled: Best texture
Make It a Showstopper
- Color Blocking: Arrange by color sections
- Uniform Bites: Clean presentation
- Fresh Garnish: Mint or powdered sugar
Variations to Try
- Cheesecake Bites: Cream cheese filling
- Chocolate-Dipped Version: White chocolate drizzle
- Skewer Style: Larger party portions
- Vegan Version: Dairy-free base
- Mini Dessert Cups: Layered presentation
FAQs
- Can I make these ahead: Assemble same day is best
- Are these very sweet: Naturally sweet only
- Can kids help make them: Yes very easy
- Do I need the cream base: Optional
- What fruit works best: Firm fresh fruit
- Can I use frozen fruit: Not recommended
- Do they travel well: Yes, transport in airtight container and keep chilled.
- Can I make them sugar free: Yes skip sweeteners
- How many per person: Three to five bites
- Are these good for hot days: Yes, but keep them refrigerated until serving to maintain freshness and safety.

Hi, I’m Olivia Chen-Williams, a professional chef, cooking instructor, and the founder of Turn Around At 50. For nearly three decades, my life has revolved around kitchens. Not the quiet, romantic kind, but the real ones. Hot, loud, demanding, and deeply alive.